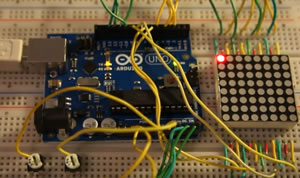
| ICS4U-E Tasks |

![]() Project 3.5. TWAIN (Task Without An Interesting Name). For your first (only?) AVR Assembly project on your DDBv7 you are asked to manipulate the position of a single LED on an ACES display device through the use of an analog input device. To provide a better fit for your software skill set I'm giving you a choice between one of two options. Please choose the one that is better suited to your abilities. You'll get more out of the exercise this way.
Project 3.5. TWAIN (Task Without An Interesting Name). For your first (only?) AVR Assembly project on your DDBv7 you are asked to manipulate the position of a single LED on an ACES display device through the use of an analog input device. To provide a better fit for your software skill set I'm giving you a choice between one of two options. Please choose the one that is better suited to your abilities. You'll get more out of the exercise this way.
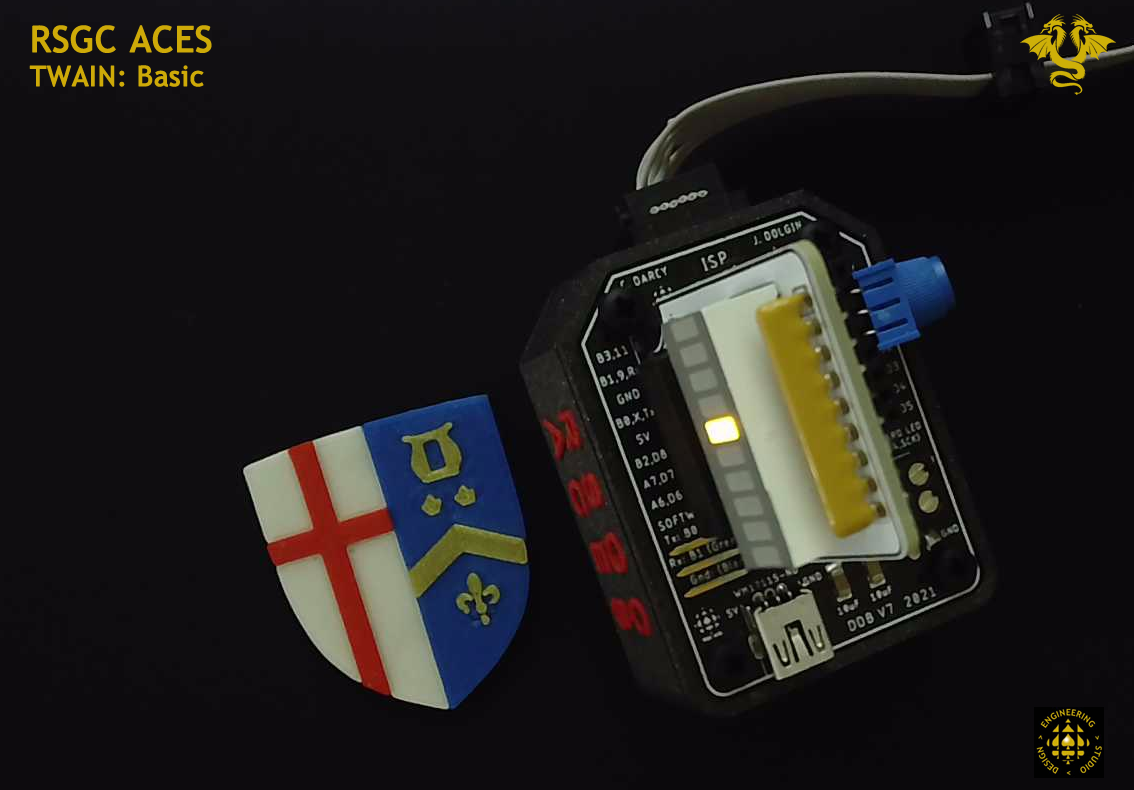
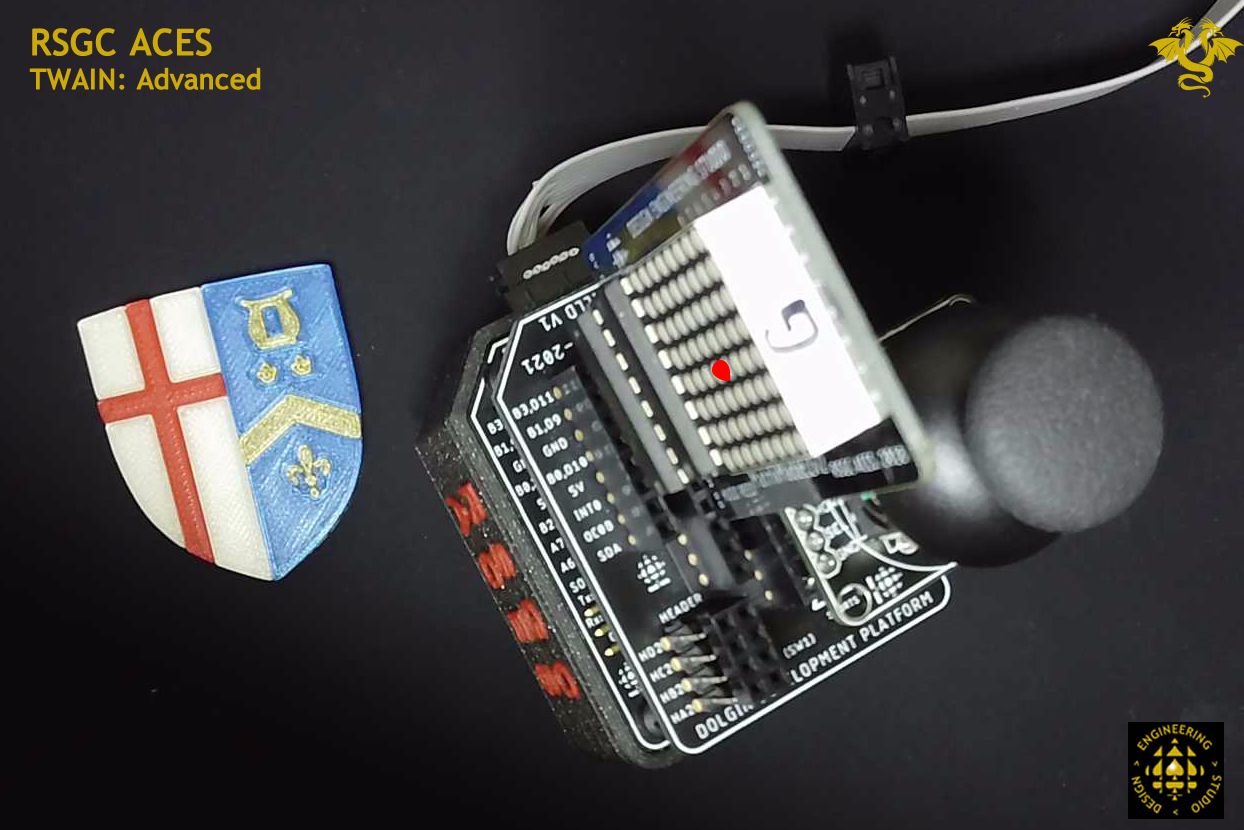
INPUT. Your trusty blue 10 kΩ trim pot can be inserted as an appliance into any number of positions within the DDBV7's female headers. Alternatively, a Thumb Joystick offers two perpendicularly arranged potentiometers that can support X-Y positioning. An RSGC ACES Thumb Joystick breakout board enables the use of the joystick as a DDBv7 appliance.
OUTPUT. An ideal location on the DDBv7 for your familiar RSGC ACES Morland Bargraph (T. Morland ACES '18, Queen's 22) has been provided offering 1-Dimensional access (X) to 8 LEDs through the support of a '595 shift register. The RSGC ACES MatrixMadeEZ (H. Reed, ACES '19, Queen's '23) offers 2-Dimensional access (X-Y) to 64 LEDs through the support of a '595 shift register and TPIC595 (Power) shift register. To achieve 'appliance' status for the Matrix Made EZ a Universal Shield V1 is required. See Mr. D for this.
| TWAIN: Basic (1D) | TWAIN: Advanced (2D) |
|---|---|
 |
 |
Task.
![]() Project 3.4. Pin Change Interrupt
Project 3.4. Pin Change Interrupt
 Create the project CombinationSafe. (or MyLocker?)
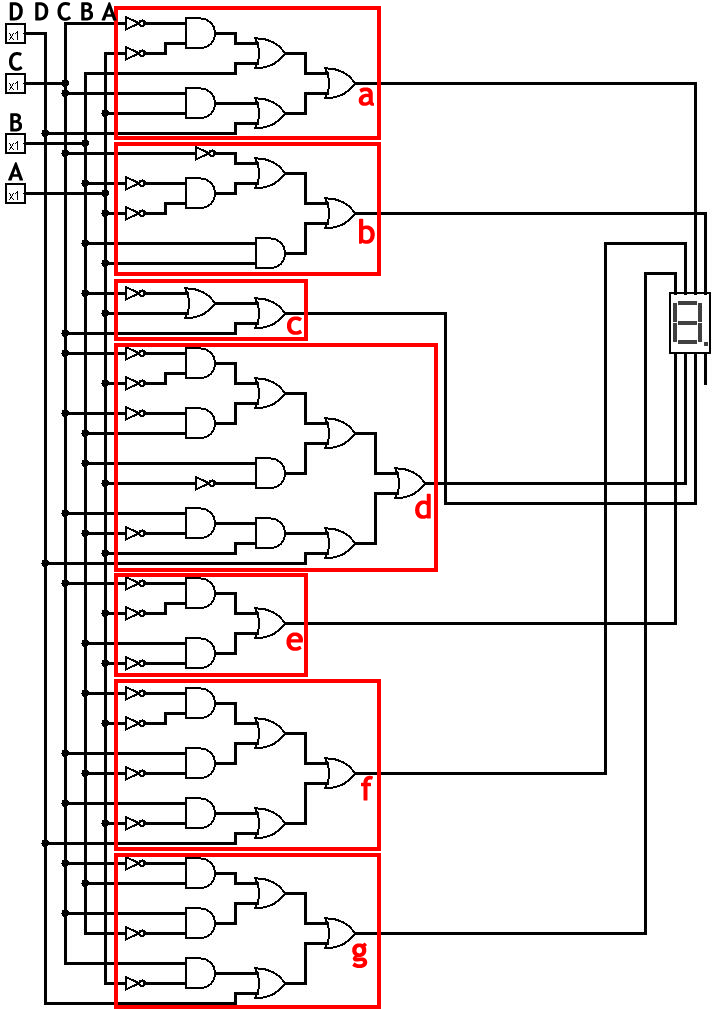
The CD4510 and CD4511 ICs are the ideal matched pair. The CD4511 BCD to Decimal 7-Segment Decoder was an integral component in ICD2O-E's Counting Circuit project. The four inputs lines DCBA (8-4-2-1) were put through the 4511's internal combinational circuit that yielded seven outputs (abcdefg), driving the common cathode 7-segment numeric display. A representation of the internal circuitry appears to the right (a similar schematic can be found in the DC Circuits Workbook).
On the other hand, for some reason the industry has not seen fit to provide a similar match for the CD4516. Why is there no CD4517 IC? For the inputs 10102 to 11112 the CD4511 simply blanks all segment outputs. In this task you will address this deficiency and set the stage for the manufacturing of a 4517 IC when you have a spare $100k. J. Rogan and J. Strain set out to do the same when they took their own shot at the device: http://darcy.rsgc.on.ca/ACES/TEI4M/2223/images/StrainRogan4017.png
An additional combinational logic circuit for the hexadecimal digits A through F (10102-11112) has been prepared for you. Click to view the circuits and manually confirm, by hand, one or more segments for a given set of inputs.
OK, so far so good, but there not much left for you to do but wire it up and confirm. Too easy. Sr. ACES thrive on a challenge.
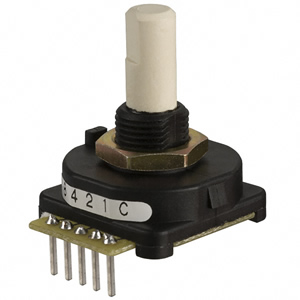
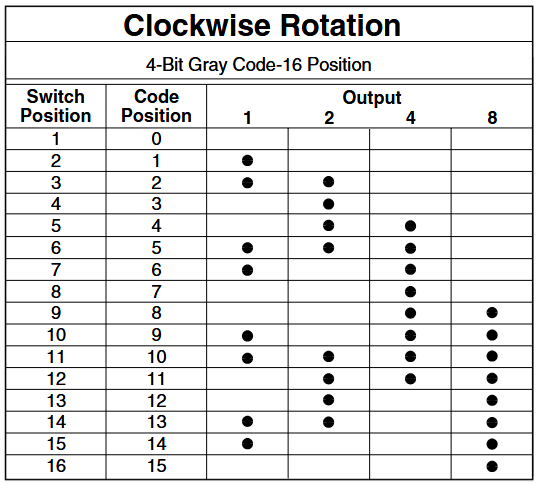
There are other 4-bit encodngs other than BCD. Grayhill's 16-Position 25LB22-G Rotary Encoder yields a 4-bit binary Gray Code in which only 1 bit changes per each detente. Follow the link above and review the device and its truth table, below.
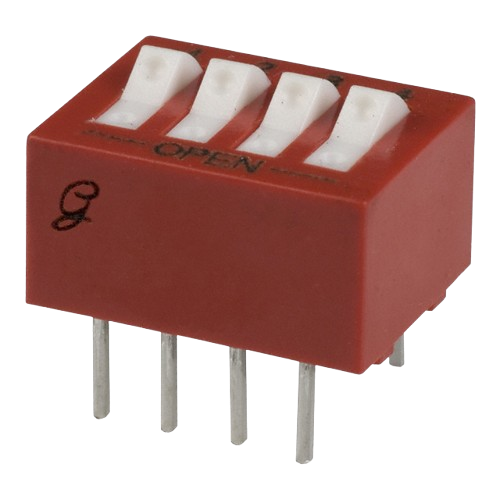
| 25LB22-G (Gray Code) Encoder | 16-Position Truth Table | Grayhill 76SBC04T |
|---|---|---|
 |
 |
 |
Task
![]() Project 3.6 AVR Assembly: Double Dabble (April-May 2025)
Project 3.6 AVR Assembly: Double Dabble (April-May 2025)
Like so many of the bespoke projects created for specific iterations of my classes, this one designed for 2024/2025 ICS4U-E ACES is especially intriguing.
The Shift and Add 3 Algorithm, also known as the Double dabble Algorithm is a fascinating conversion technique from Binary to Packed BCD that we simply can't pass up. The fact that it is reversible AND that it can be implemented in hardware, are two more inspiring reasons not to let this opportunity slip by.
You were encouraged to implement the Double Double Algorithm in (high level) Arduino C. Those students that were motivated to do so are better positioned to undertake this version in AVR Assembly, within the unforgiving Arduino IDE, under AVR-as. Microchip Studio would be a better IDE but, like so many other engineering tools, their authors do not care to develop a Mac version. ACES are a resilient lot so we forge ahead, and go where few others dare to explore. Like so many other modern resources at your finger tips that flatten the learning curve, this project is a test of the effort you have invested over the past few weeks in maintaining and understanding the archive of preparatory assembly routines that were prepared for you.
Task
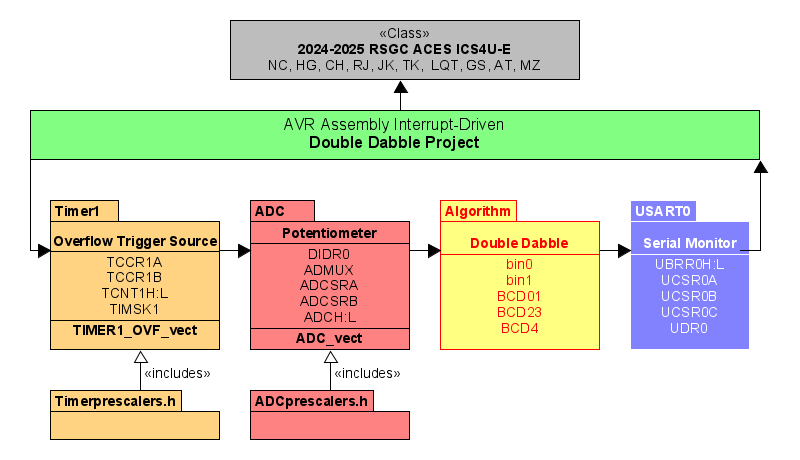
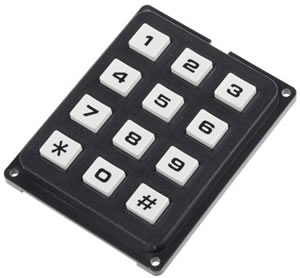
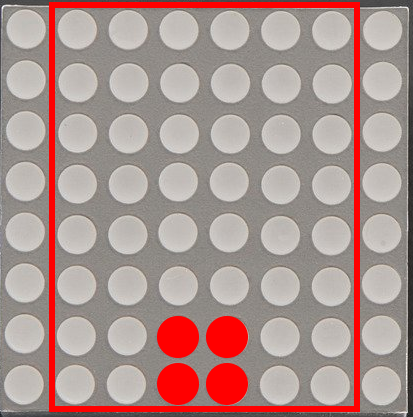
![]() Project 3.3. Keypad Matrix Echo. For your first ATtiny84 project of ICS4U you are to maximize your mid-level coding skills in the development of a prototype that echoes button presses on your 12-key telephone keypad onto your small Adafruit 861 8x8 matrix. Each of you has been assigned a 4x3 subset of your matrix as shown below that represents the 1:1 Key→LED mapping. For example, should your user press the '0' key, the LED indicated will light up for 300 ms, only.
Project 3.3. Keypad Matrix Echo. For your first ATtiny84 project of ICS4U you are to maximize your mid-level coding skills in the development of a prototype that echoes button presses on your 12-key telephone keypad onto your small Adafruit 861 8x8 matrix. Each of you has been assigned a 4x3 subset of your matrix as shown below that represents the 1:1 Key→LED mapping. For example, should your user press the '0' key, the LED indicated will light up for 300 ms, only.
Your ATtiny84 has just enough GPIO pins (10) to pull this task off as I describe it below (7 input; 3 output). Furthermore, the code is surprisingly short if done skilfully.

(Basic) Task.
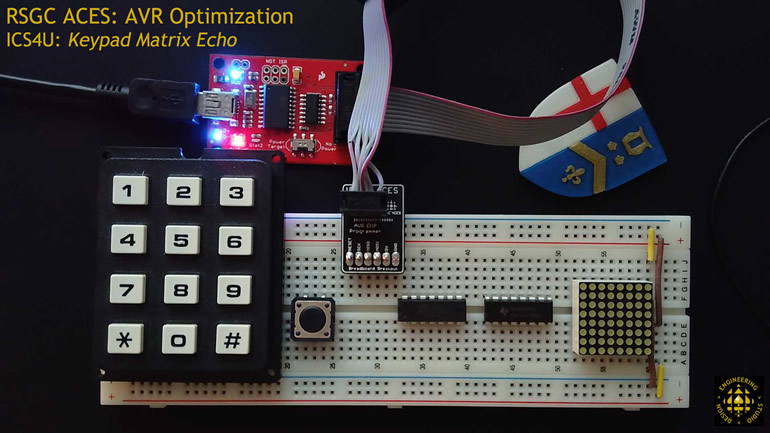
 Optional (Advanced) Task.
Some of you may wish to consider going beyond the basic task.
Rather than 1:1 Key→LED mapping, a 1:4 Key→LED mapping could be achieved. What is compelling about this implementation is that it requires a skill you already possess: PoV!
You have the time; consider it if you are inspired.
| Supplied Parts List | |
| Quantity | Description |
|---|---|
| 1 | MOSFET P-CH 30V 80A TO220-3 |
| 1 | 47 uH 1.5A 56MΩ Inductor |
| 1 | RES 100 Ω 5% 5W AXIAL |
| 1 | DIODE SCHOTTKY 10V 1A DO204AL |
ACES Reference: DC-DC Buck Converter
This math-intensive prototype is an ACES first as no one. not even Mr. D., has developed this circuit. It falls on the shoulders of one of my talented 12s to achieve it.
Holiday Challenge.
Develop a DC=DC step-down (buck) converter that will drop a 5V input down to 3.2V. The real challenge is to understand and communicate the mathematics behind its functionality.
The Grade 10 Joule Thief project is a DC-DC step up (boost) converter that raised the 1.5 V AA battery input to the 3 V required to drive a bright white LED.
TBC...
With efficient register level shiftout functions seamlessly accessible to your future projects, it is an opportune time to examine a similar optimization for input. This project exploits single statement input of the full byte-state of an 8-position rocker switch. For confirmation you will echo the input on your 8-LED Morland Bargraph V4.
The ability to read the state of 8 switches with a single statement provides the ACES Binary Challenge and other applications with increased efficiency. In the partially wired prototype below it is easy to imagine that continuous echoing of the state of the rocker switches on your MBV4 can be achieved with just two lines of caller code.
Task
If you have the motivation, curiosity, and time this week you are encouraged to consider developing an emulation of the ACES' Binary (Unsigned) Challenge in which random unsigned byte values (in decimal) are presented on either an LCD, OLED, or multiple 7-Segment displays, for example (the Serial Monitor is likely not an option in this project as we need all 8 bits of PORTD for input). You are awarded credit for providing the correct response, in binary. The points are 30 (if you answer in less then 10 s), 20 (if you answer in less than 20s) , and 10 if you eventually enter the correct value at any time before the 5 minute time limit expures.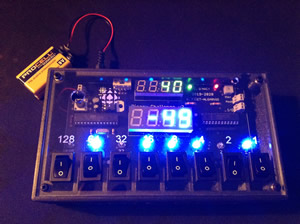 Create the Arduino Nano project, BinaryChallenge.
![]()
![]() Project 3.4 Register Level Shiftout
Project 3.4 Register Level Shiftout
With your register level shiftout (outshift) of a single byte (uint8_t) finalized in class it is time to pair up (yes, a group project) to implement OVERLOADED register level outshift functions that will accomplish the same for uinti16_t, and uint32_t integers. Our recently developed ACES Morland Bargraph V4 is an ideal vehicle to test and display the results as it breaks out the 595's Carryout pin to enable chaining. The graphic below suggests a prototype wiring strategy. Click to enlarge.
 ACES' Optimization considerations include an efficient means to reuse code such as your effective register level outshift() function. The natural question that arises is, "How best to make use of previously developed stable coding assets in future projects?". We could certainly 'copy and paste' the code into every new project but that has drawbacks. For example, what if we want to modify the code at a later date? We'd have to hunt down every previous copy of the asset and edit and test. Surely a better solution would be to maintain ONE version of the asset and place it in a location that is accessible from every new project we create. This project will achieve that by introducing you to the concept of a personal code library.
Task
 Feel free to collaborate with the ACE you normally sit with in class while developing this exercise.
void outshift(volatile uint8_t *port, uint8_t dat, uint8_t clk, uint8_t dir, uint8_t valu){

void outshift(volatile uint8_t *port, uint8_t dat, uint8_t clk, uint8_t dir, uint16_t valu){

void outshift(volatile uint8_t *port, uint8_t dat, uint8_t clk, uint8_t dir, uint32_t valu){
 Create a new folder called ICS4U23 within the \libraries folder of your Arduino sketch folder
void shiftOut(uint8_t dataPin, uint8_t clockPin, uint8_t bitOrder, uint8_t val) {
  uint8_t i;
  for (i = 0; i < 8; i++)  {
    if (bitOrder == LSBFIRST)
      digitalWrite(dataPin, !!(val & (1 << i)));
    else
      digitalWrite(dataPin, !!(val & (1 << (7 - i))));

    digitalWrite(clockPin, HIGH);
    digitalWrite(clockPin, LOW);
  }
}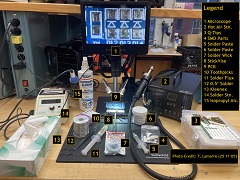 One more skill that is worth gaining competency with is surface mount soldering. The DES has all the tools and resources to make this both a satisfying and productive experience. These include hot air stations, solder paste, flux, Andonstar AD249S-M
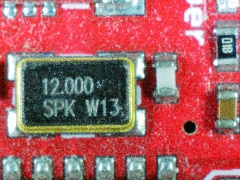
Microscope and Stikvise PCB Vice with High Temperature PTFE Jaws. The image (below, right) of the 12 MHz crystal on your Sparkfun AVR Pocket Programmer was taken with the microscope in the DES.
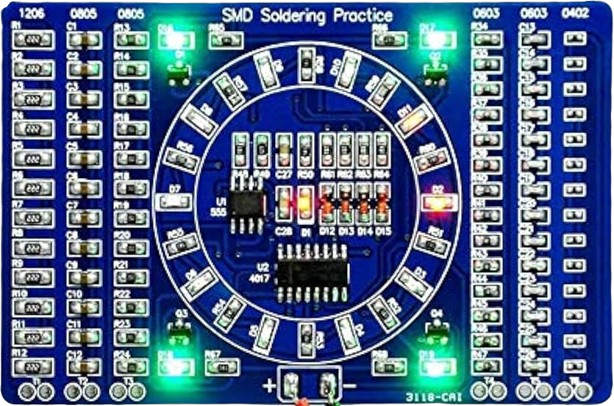
Each of you will be provided with an inexpensive NE555/CD4017-based kit (below, left) that you are asked to complete to gain your SMD facility. Thanks to A. Shen (ACES '26) we have a translated version of the instructions. Scanning the QR Code on the instruction leads to a more detailed PDF providing more guidance on where to place the parts.
Before you attempt the task please watch ![]() this video to follow one practitioners experience in completing the device.
this video to follow one practitioners experience in completing the device.
N. Andrew (ACES '26) ![]() recorded an SMT sequence in his session for your benefit:
recorded an SMT sequence in his session for your benefit:
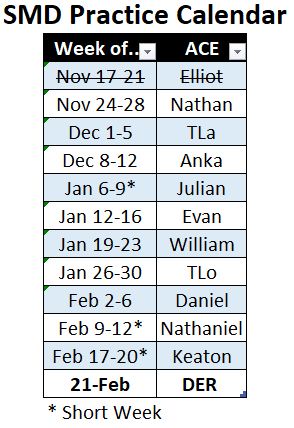
You are asked to complete this task ON ODD DAYS ONLY so that I can support and see you undertake the task.
| SMD Practice PCB | ACES' Microscope Image of Pocket Programmer Crystal | 25/26 Calendar |
|---|---|---|
 |
 |
 |
![]() Project 3.? Gate-Level Minimization
Project 3.? Gate-Level Minimization
TBD
![]() Project 3.3 AVR Assembly: Traffic Light
Project 3.3 AVR Assembly: Traffic Light
Note: AssemBLY is the name of the language. AssemBLER is the name given to a program that translates assembly language code into machine language code. Don't let the internet confuse you.
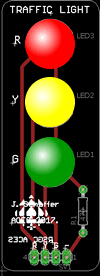 Task
Task
Develop a Standalone AVR Assembly Language program (.S) to continuously drive your ACES' Traffic Light. You are free to configure and implement it any way you want (advanced green?, ATtiny84 or 85, any number of Traffic Lights (full intersection?) )as long as it bears little resemblance to anyone else's! Your project's .ino file must remain empty.
Note. Think EFFICIENCY. Write code that is uniquely creative.
References
Few secondary schools (none?) these days appreciate the advantages of introducing students to Assembly Language. You know by now the ACES program thinks differently. Writing in any high-level langauge like C or Python, is like using libraries to do the heavy lifting for your ISPs. High-level languages hide most of the hardware details, preventing optimization. ACES engineer better. The downside of our position is that it can be a challenge to find resources to support your learning of Assembly Language for 8-bit AVR MCUs. On top of this we are limited to the minimal Arduino IDE due to 'external' factors imposed on us. Nevertheless, it can be done and this is where the long-term benefits accrue. Here are a few links that provide some insight into our challenge,
![]() Project 3.? Arduino: Command Line Interface (CLI)
Project 3.? Arduino: Command Line Interface (CLI)
Feature-rich IDEs are indispensable tools for developing and uploading code for emebedded systems applications. To achieve this, much like libraries, they hide much of the toolchain intricacies from the user and, hence, a deeper understanding of the processes. To enhance your education, we must explore behind the curtain.
To prepare for the years ahead, it is advantageous for ACES to understand C's development cycle. An informative introduction to the Arduino C Toolchain (files, libraries, and utilities) can be undertaken by using the Arduino Command Line Interface (arduino-cli).
Mac
Windows
Task
This project is a little different as will be your Report.
Research the online resources for the Arduino CLI and use them to condition yourself to the available tools.
After a number of successful development cycles with code that depends on a library or two, turn on your screen recorder and capture a complete development cycle for your own video.
TBD....
My discoveries...
My arduino-cli config file path:
"C:\Users\Chris D'Arcy\AppData\Local\Arduino15\arduino-cli.yaml"
Here's the command to have the build folder placed in the project folder:
arduino-cli compile -b arduino:avr:nano --build-path "C:\Users\Chris D'Arcy\Documents\Arduino\blink\build"
arduino-cli upload -p arduino:avr:nano "C:\USers\Chris D'Arcy\Documents\Arduino\blink\build"
![]() Project 3.2 CHUMP See here.
Project 3.2 CHUMP See here.
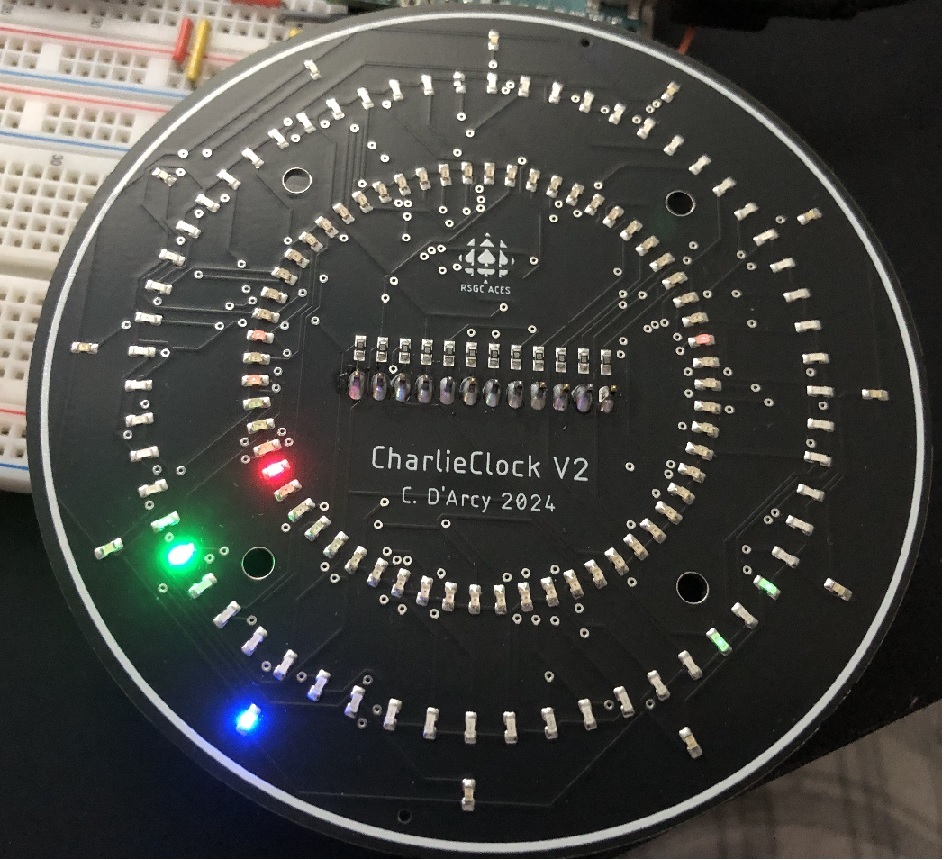
Reference: CharlieClock V2 Data Model
This project asks you to develop a desktop clock based on the ACES CharlieClock PCB provided. The expectation is that your efforts combine hardware, software and design domains in equal measure to yield a seminal device that you can use to leverage your applications to university and beyond, just as the 2015 Hardware ACES (yellow Hard Hats) achieved when they created RSGC's 50th Anniversary Clock.
From the Hardware perspective, you may take an RTC or non-RTC approach to your device, both of which must permit the user to update the time (and possibly date) information. Your choice of onboard MCU will be of significant design influence.
From the Software perspective, the data model you develop for the 132 LEDs is the key to its optimized implementation.
From the Design perspective a front diffuser plate similar to G. Davidge's 8-Channel Graphic Equalizer would be appropriate
The photo to the right shows a time of 7:39:40.
Good luck, make it count.
![]() Project 3.0. SMT: PB Machine. One of the greatest challenges (and I believe, privilege) for ACES is to influence the direction of our program. Through your imagination and skill you are expected to contribute to the enhancement of our mutual creativity, tool set, and assets.
Project 3.0. SMT: PB Machine. One of the greatest challenges (and I believe, privilege) for ACES is to influence the direction of our program. Through your imagination and skill you are expected to contribute to the enhancement of our mutual creativity, tool set, and assets.
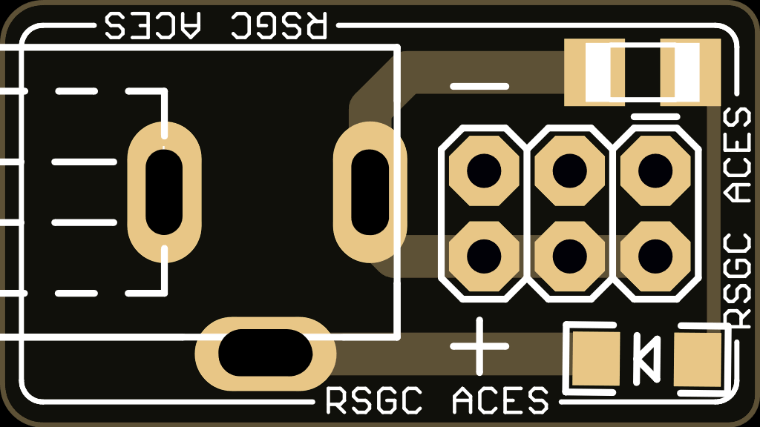
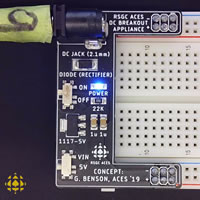
P. Bagga (ACES '17, UofT '22) fulfilled this opportunity/commitment when he decided he could improve on the DC Breakout Board ACES were using by adding a simple Resistor/LED power indicator using small 1206 size SMT components. Click on the image to the right of the (affectionately called) PB Machine for a more thorough explanation of its design. Apart from its functionality, this PCB offers a perfect introduction for Sr. ACES to practice the hand-soldering of SMT 1206 parts.
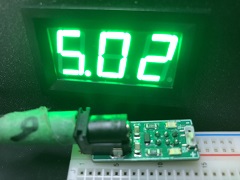
G. Benson (ACES '19, Calgary '24) also met this challenge with the enhancement of the indispensable PB Machine (P. Bagga, ACES '17). In the Fall of 2019 and 2020, Sr. ACES had the opportunity to solder up their own GB machine and put it to good use in the pursuit of their own prototypes. In the 2021/2022 year ACES benefit from JLCPCB's relatively inexpensive SMT Assembly Service requiinrg only additional THT soldering. Your experience with electric circuits has been largely limited to components that use through-hole technology (THT). To round out your proficiency with all components, your next few projects will require the use of devices that use surface-mount technology (SMT). As the graphic reveals, the smallest size that is reasonable for hand-soldering techniques is the 1206 family, so this is what we carry in the DES inventory. Update: By the Spring of 2021, ACES had shifted their skill set to the SMT Design and (reasonably-priced) Assembly of PCBs to JLCPCB. Increasing dependency on outsourcing may not be the wisest decision in the long run but, in the short run, it remains an option. You will be provided with a newly designed and fully assembled SMTV1 GB Machine to serve for both function and inspiration.
GB Machine (click image to enlarge) |
1206 LED Package |
GS Machine ('25) (click image to enlarge) |
|---|---|---|
 |
 |
Task.