MAKING PCBs: TONER TRANSFER METHOD |
2008 ACES: M. Mallin, O. Blake, E.t Byrne, and J. Mason
STEP |
MATERIALS |
DESCRIPTION/INSTRUCTIONS |
IMAGES/GRAPHICS |
1 |
|
Acknowledgements. Brad D'Hondt, IT Director at St. John's Kilmarnock School, came to RSGC as part of a CESI Evaluation Team. We had a brief chat in which he described the process he uses to make his own PCBs as a hobby. A trip to SJK a week later to talk with Brad provided further inspiration and final details needed to kickstart the introduction of the process at RSGC. The success we experienced is due in large part to Brad's extremely generous infusion of time and knowledge. Alternate descriptions: |
 |
2 |
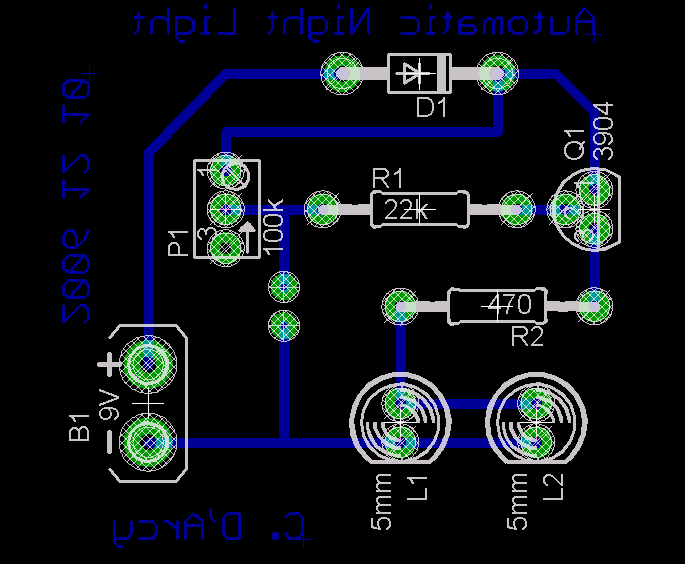
Prepare Layout. Once your project has been identified, the layout for the printed circuit board needs to be developed. Four hobby purposes, the EAGLE freeware CAD Application was recommended. An early attempt at duplicating the Automatic Night Light layout from Dave Cutcher's Evil Genius text appears at the right. Keep the layout tight. This will save time in the etching tank and cost of copper-clad board. |
 |
|
3 |
|
Print Layout. Print the layout on plain copy paper first. Once satisfied with the traces, cut a piece of glossy photo paper to fit and cover and adhere it to the page with the design already on it. Print again. |
 |
4 |
|
Using the aircraft snips, cut a board large enough to contain your schematic. add a 1-cm margin around the outside for handing and possible mounting holes. Use 80-grit sandpaper to remove any burrs left by the snips (the board has to flat for good contact with the iron). Use a Scotch-Brite Scour Pad® pad to clean the face of the board. Finally, wipe with Lacquer Thinner to remove any stains and oils from fingerprints. Cut the glossy paper containing the schematic to size and place over the copper board. Place a sheet of regular copy paper over the glossy paper and board. Make sure the iron is hot. Place the iron over the sandwich and hold for 1-2 minutes before rotating 90°. Repeat this three more times. When you are about to transfer your design from the computer to PCB, take your sweet time. The first time I tried, I didn't keep the iron down long enough so I got a semi-complete PCB. If that does happen, use Lacquer Thinner to get the toner off of the board and try again. Put a lot of pressure on the iron for at least 6 minutes for a good transfer. - Mike Mallin |
 |
5 |
|
Prepare Etchant Tank. First, you need to fashion two separate ways of applying stress to the unetched PCB: heat and bubbles. The heat should be applied through a fish tank heater, put on max heat setting (30°). Be sure that there are no metal components on the outside, if they are exposed to the Ferric Chloride it could potentially erode them. Then you must poke some holes into a length of plastic tubing and coil it along the bottom of the tank you are using (we chose to use a juice container) and attach the other end to a bubble machine. Ddrill a single hole into your PCB in a corner where nothing is printed and tie a length of string through it long enough to suspend in the Ferric Chloride solution. Then, wearing thick safety gloves, pour enough Ferric Chloride to completely immerse your board and then turn on both the heater and the bubbler. Lower your board into the solution and tie the string to something. The process takes anywhere around 5-10 minutes to be safe. Once completed, remove from the solution and rinse thoroughly in water until all traces of Ferric Chloride are gone. don't forget the safety gloves! - Elliot Byrne | 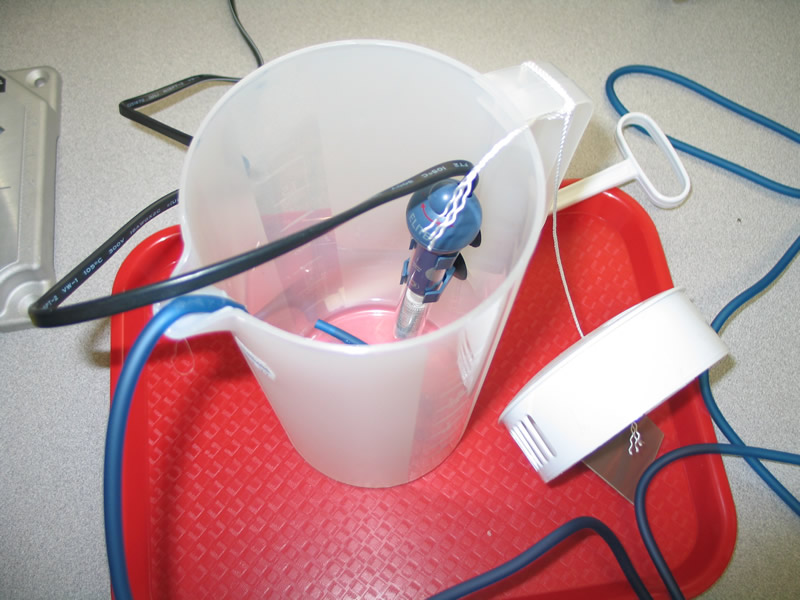 |
6 |
|
Etching is one of the easiest steps in making a PCB. You take the string from the Etching Tank and tie it to the hole on your copper clad board. Then, turn on the heater and the air pump for the Etching Tank. Carefully place the copper clad board into the Etching Tank. Wait 20 minutes or until all the copper is removed from the copper clad board before removing the PCB. Now untie and dry your board with paper towel. NOTE: For improved results and faster etching times, give the Etching Tank time to warm up before placing your board inside. Be careful not to over etch. Just like a photograph, over exposure can weaken some of the traces. - Oliver Blake | 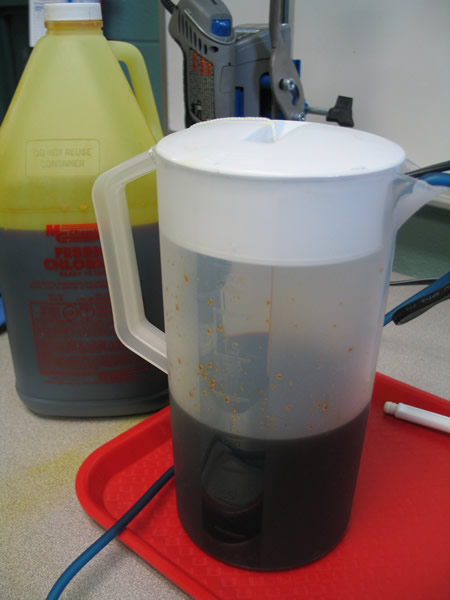 |
7 |
|
Remove Toner. Apply a small amount of either liquid to a paper towel and wipe away any remaining toner from the traces |  |
8 |
|
Drill Holes. |