Friday June 6. 12:30 in the Lab (last exam). You will be expected to take media of your working prototype, prior to leaving it with me at the end of the exam for evaluation purposes. By 8:00 pm on Friday June 6, you will add your writeup of the exam to your ER and submit it to handin.
~~~~~~~~~~~~~~~~~~~~~~~
Monday May 5. Each of you has received a bag of parts that contains the components listed below. Over the course of the next month you are to master the skills necessary to address the LEDs in the matrix either singularly, or in full or partial rows and columns. Appearance of blocks of LEDs will be handled by multiplexing (PoV) since you will not be using current driverss. As always use the compoments in accordance with their recommended electrical requirements as replacements are not available. You will bring these parts with you into the exam as they will be integrated with the additional parts supplied at the start of the exam into the circuit you will be expected to prototype.
Initial Parts List
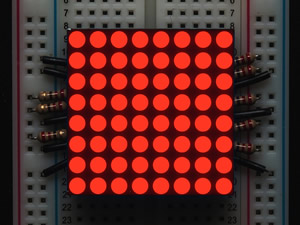
- 1 - 1.2" 8x8 Ultra Bright Red LED Matrix (BL-M12A881UR-11: Datasheet)
- 8 - 220 Ω 1/4W Fixed Resistors
- 2 - 74HC595 Shift Registers (Datasheet)
- 1 - Extra-large (3 or more single boards) prototyping board (keep your assembly tight, leaving at least half the board free for the additional exam parts)
References
|
 |
 You are free to collaborate with your peers in the pursuit of your own mastery of these parts, but the code you prepare should make intuitive sense to you. For example, the datasheet identifies rows 1 through 8, but coders typically prefer naming them 0 through 7. As well, the datasheet refers to Row 1 Column 1 in the top left corner. Math students may prefer their origin to be in the bottom left corner.
With an orientation and addressing scheme worked out, turn your attention to your shift registers. One can be used for the rows and the other, the columns. The common cathode device you have will require a ground to appear the shift register pins attached to the cathode side of the LEDs to turn them on. The animated gif to the right demonstrates patterns you should be confident reproducing. Note that for each of the sequences only on dimension is active at one time. With a faster frame rate your eye could perceive a two-dimensional pattern.
Your coding design decisions are crucial. Some useful techniques include,
- Versatile, single-purpose, well-named functions speed up the development process.
- Arrays of bytes can work well with the ShiftOut function.
- Bit shifting through the use of the << and >> operators enable easy access to powers of 2, as in 1<<n = 2n.
- Using B00001011 or 0x0B as expression for the decimal value 11 are handy
- The bitwise NOT operator, ~, can be using to invert binary values